Manage Deliveries
Buildlogic’s mobile app, Deliveries, is part of the Site Supervisor’s suite of mobile applications which also includes action items, timesheet approval and site diaries.
Manage deliveries allow site supervisors to view purchase orders and contracts, go to the delivery tab and change the status of the delivery plus take a photo of the delivery docket which attaches to the Notes tab against the purchase order/contract on the web.
Activating Deliveries for Site Supervisors
Buildlogic Client Administrator function – If you are adding Manage Deliveries to an existing mobile user, as shown in the snapshot below, highlight Site Supervisor Suite and go to the Functions and tick the box for Deliveries.

Once you have given a user access to Deliveries, and they have not used any of the other Buildlogic Mobile functions previously, please ensure you send them an invite to authenticate to the mobile app and sign in via the Send Invite button.

Existing Site Supervisors using mobile functions will see Deliveries added when they sign into the app.
What else needs to be set up at the Web end?
There is little required at the web end for purchase orders and contracts to show on the mobile so that site supervisor can have access to deliveries. The delivery tab against a Purchase order or Contract will automatically be set to Pending Delivery when it is created on the web.
How to use Buildlogic Mobile Deliveries
After you have received your sign-on and password from your Buildlogic Client Administrator via an email, you need to follow the prompts to the web address and sign in. When you first navigate to the website from your phone you should be prompted to “Install” as an application. If you get this notification, hit install and it will create an application link on your home screen, as any other application would. You can then use this new shortcut to access the application.
You will be presented with the following screen once you have downloaded so you can sign-in with your user name and password.
If you also have access to Timesheet or Timesheet approvals they will also be listed on the screen when you log in.
At this point we are interested in Deliveries, which is available when you select Jobs.

On selecting Jobs, you will be provided with a list of jobs. Highlight the job and hit the arrow. The next screen will look something like this.

Select Deliveries and a list of orders/contracts for the job will be displayed.
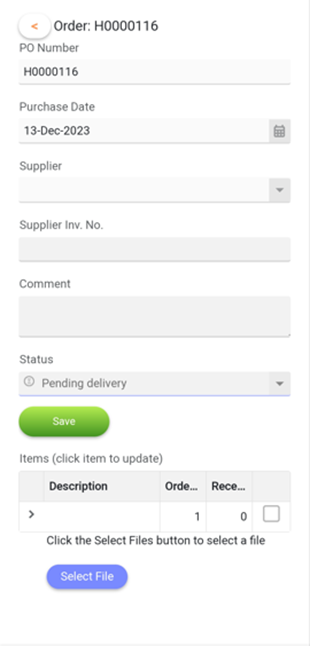
From this screen you can change the Status of the delivery. The current status’s available are:
- Pending Delivery
- Part Delivery
- Reject
- Returned to Supplier
- Delivery in full
Note on this screen if the order isn’t delivered in full you can change the number received by selecting the items.

Attachments
If you scroll to the bottom of the screen you can select file and you can either pick a photo from your Photo Library or you can take new photo and use it. More than 1 photo can be added if required. This is where you'd take a photo of the delivery docket and attach it so it comes through to the purchase order on the notes section.
What does a user see on the web?
On the delivery tab against a Purchase Order, the status will have been updated.
The Delivery Docket can be viewed on the Notes tab against the Purchase Order and you can also view the items received.

Was this article helpful?
That’s Great!
Thank you for your feedback
Sorry! We couldn't be helpful
Thank you for your feedback
Feedback sent
We appreciate your effort and will try to fix the article