Creating a New User
Note: To create a new user you will need to be a Buildlogic admin user.
Field users should be created from the Contact Card. See:
General/Admin User Setup
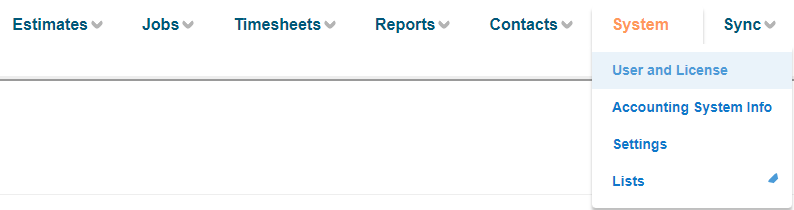
Log in to Buildlogic and navigate to System > User & License.
To create a new user, press the +New button.
DO NOT ENTER THE INCORRECT EMAIL - IT CANNOT BE CHANGED AFTER SAVING
You will need to create a new user if you enter the incorrect email address.
After entering the user information and confirming it is correct, hit the Save button under the "Default Landing Page" selection.
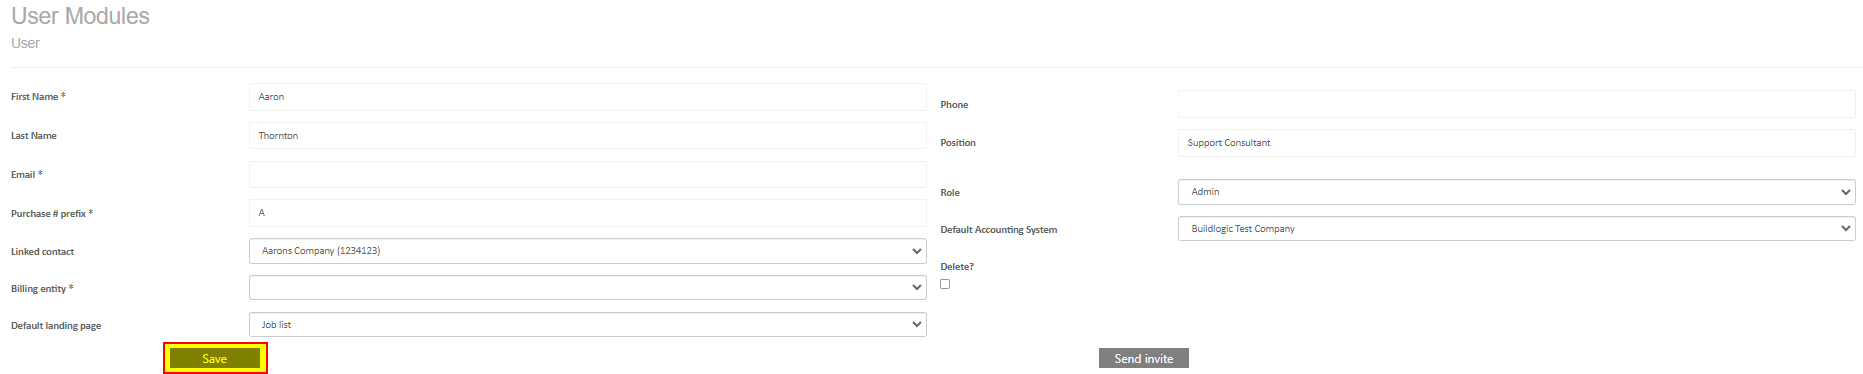
Allocating Modules
Next, allocate modules to the user at the bottom of the screen.
The numbers next to each module indicate how many licenses are available and the total licenses for that module. Example: 0 out of 2 available.

If no licenses are available for a module, you can contact support to purchase another license (support@buildlogic.com.au), or remove the license from an existing user and reassign it to the new user.
Any modules that have licenses available can be ticked in this screen, giving the user access to those modules.
Every user needs a Core license - all other modules are optional.
Module Functions
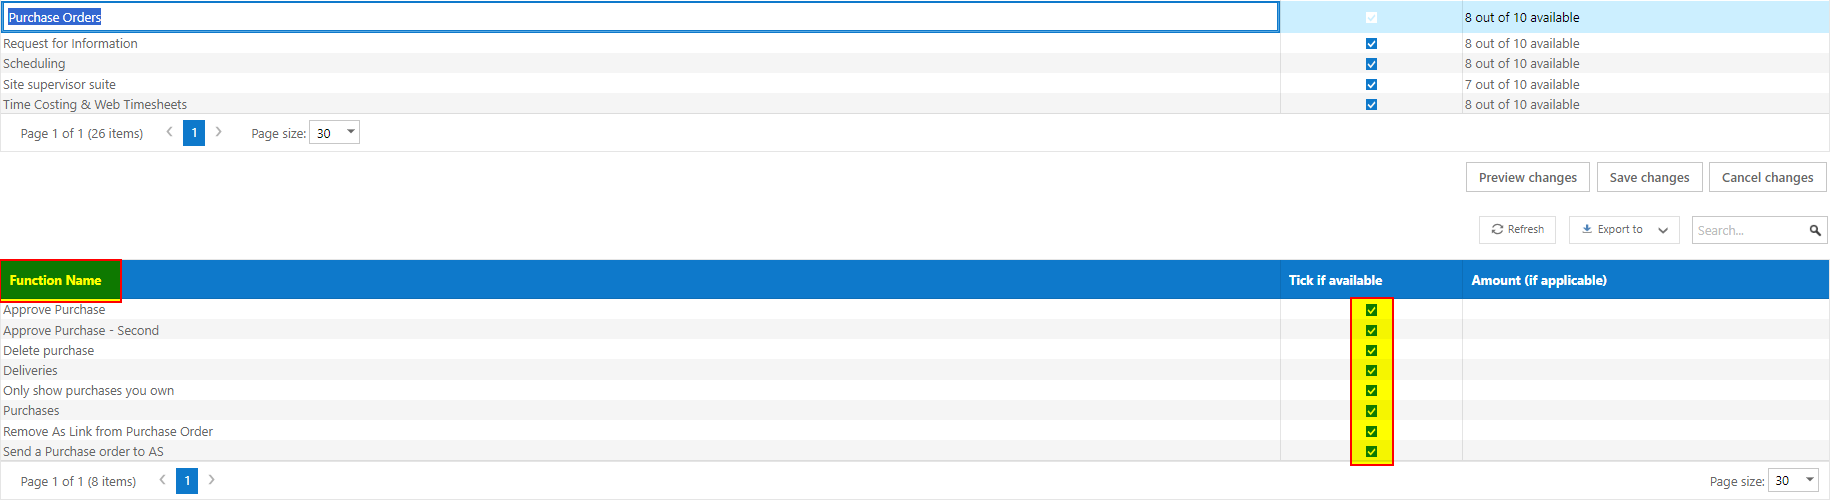
When you've enabled the modules the user requires and saved, you can select a module to open a list of functions, which will appear below the modules list.
This gives you extra control over what a user can do or see within each individual module. Each module has a range of functions you can look through - see an example for Purchases below:
Copying Functions from Another User
Rather than manually setting all the modules and functions, an admin user can copy the settings from an existing user - a quick way to set up new users when staff come onboard.
In the user edit screen (System > User & License > Edit), select the user you want to copy from in the drop-down menu, then press the Copy button.
This will apply the selected user's module and function settings to the new user. You can then adjust any individual functions as required before sending the invite.
Sending the Invite
Once the new user is set up and modules are allocated, press Send Invite. This emails a link, with their username and password, to the assigned email address.
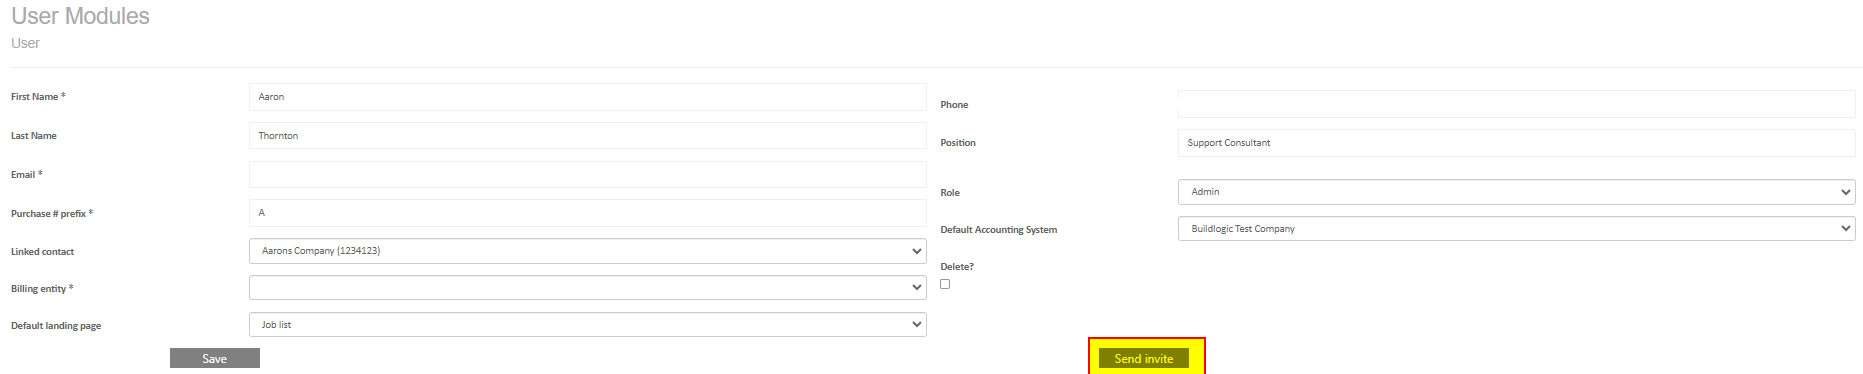
Field Explanations
| Field | Description |
|---|---|
| Once a user is saved, the email address cannot be modified - ensure the email is correct before hitting Save. If you enter the incorrect email address you will need to mark the user deleted and start again. | |
| Purchase Prefix | The letter that appears before purchases created by this user, e.g. if a user has a prefix of P, purchases created by this user will be P000001, P000002, etc. |
| Linked Contact | If the user is going to enter their time via timesheets, you need to set up a contact (Contacts > List > +New) and select it from this drop-down menu. |
| Default Landing Page | Dictates what page is displayed on login. |
| Role | Admin users have access to the System menu and administrator functions; General users do not. |
| Default Accounting System | Be sure to select your default accounting system - you can run into issues if this is not set. |
Was this article helpful?
That’s Great!
Thank you for your feedback
Sorry! We couldn't be helpful
Thank you for your feedback
Feedback sent
We appreciate your effort and will try to fix the article