Estimate Pricing & Detail Grid Guide
Trade Structure Menu (Left)
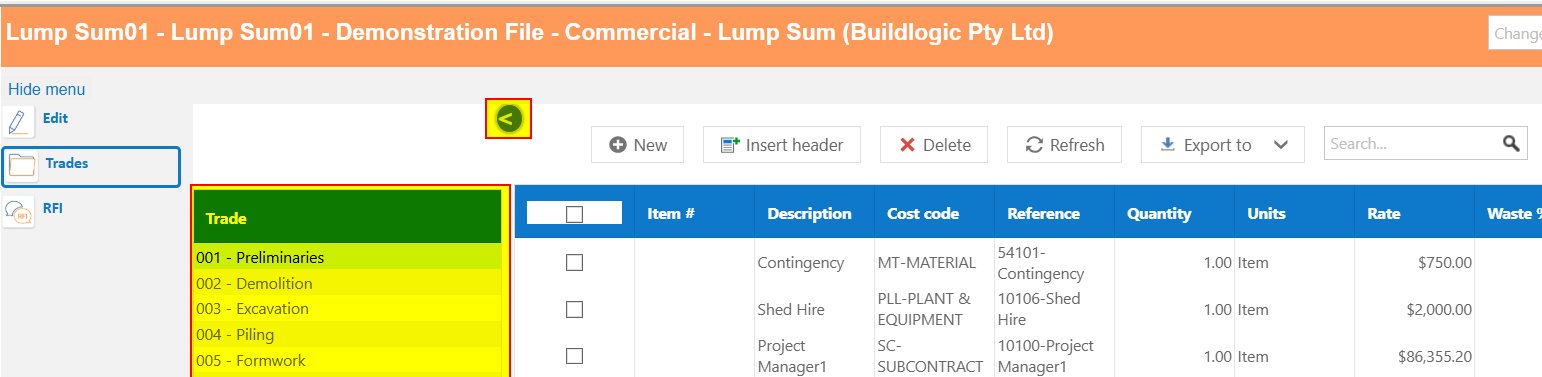
Toolbar & Actions
- New – Add a new row
- Insert Header – Add grouping headers
- Delete – Remove selected row
- Refresh – Reload data
- Export – Export to PDF, DOCX, RTF, XLSX
- Priced Items – Insert priced items into an estimate from your price list
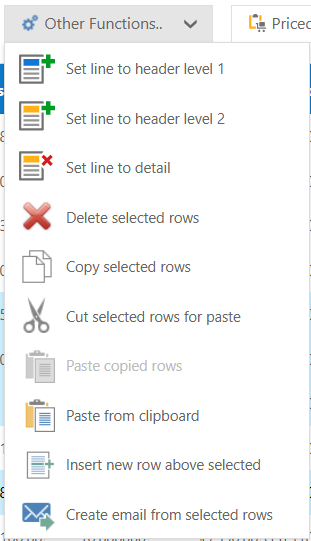
- Copy Down – A user can put their cursor in a field and use this button to copy down to the next header
(button one right of priced items) - Move Up/Down – Use these arrows to move lines up or down in your estimate detail list
- Colour Assignment – use this selection to change the colour of lines, same as trade summary list.

- Set Header Levels (Detail / Level 1 / Level 2) changes a detail line into a header line vice versa
- Delete Selected Rows delete selected rows, used for deleting many lines at once.
- Copy, Cut, Paste rows between estimates or into the same estimate
- Insert New Row Above selected use this function to insert a row above your selected row, save having to move a new line into the correct spot after entering.
- Create Email from selected rows - creates an email with a formatted table including detail of the selected rows, good for supplier quote requests.
Pricing Grid Columns
| Column | Description |
|---|---|
| Item # | Part number if using priced items |
| Description | Item description |
| Cost Code | Cost classification |
| Reference | Reference code |
| Quantity | Item quantity |
| Units | Measurement units |
| Rate | Unit rate |
| Extension | Calculated value (Qty × Rate + Waste) |
| Markup % | Markup percentage applied |
| Gross | Total including markup |
| Tax Code | Tax Type (GST, GNR, FRE, N-T) |
| Option | When your quote has multiple options for the client you can select the option they chose here before converting to a job |

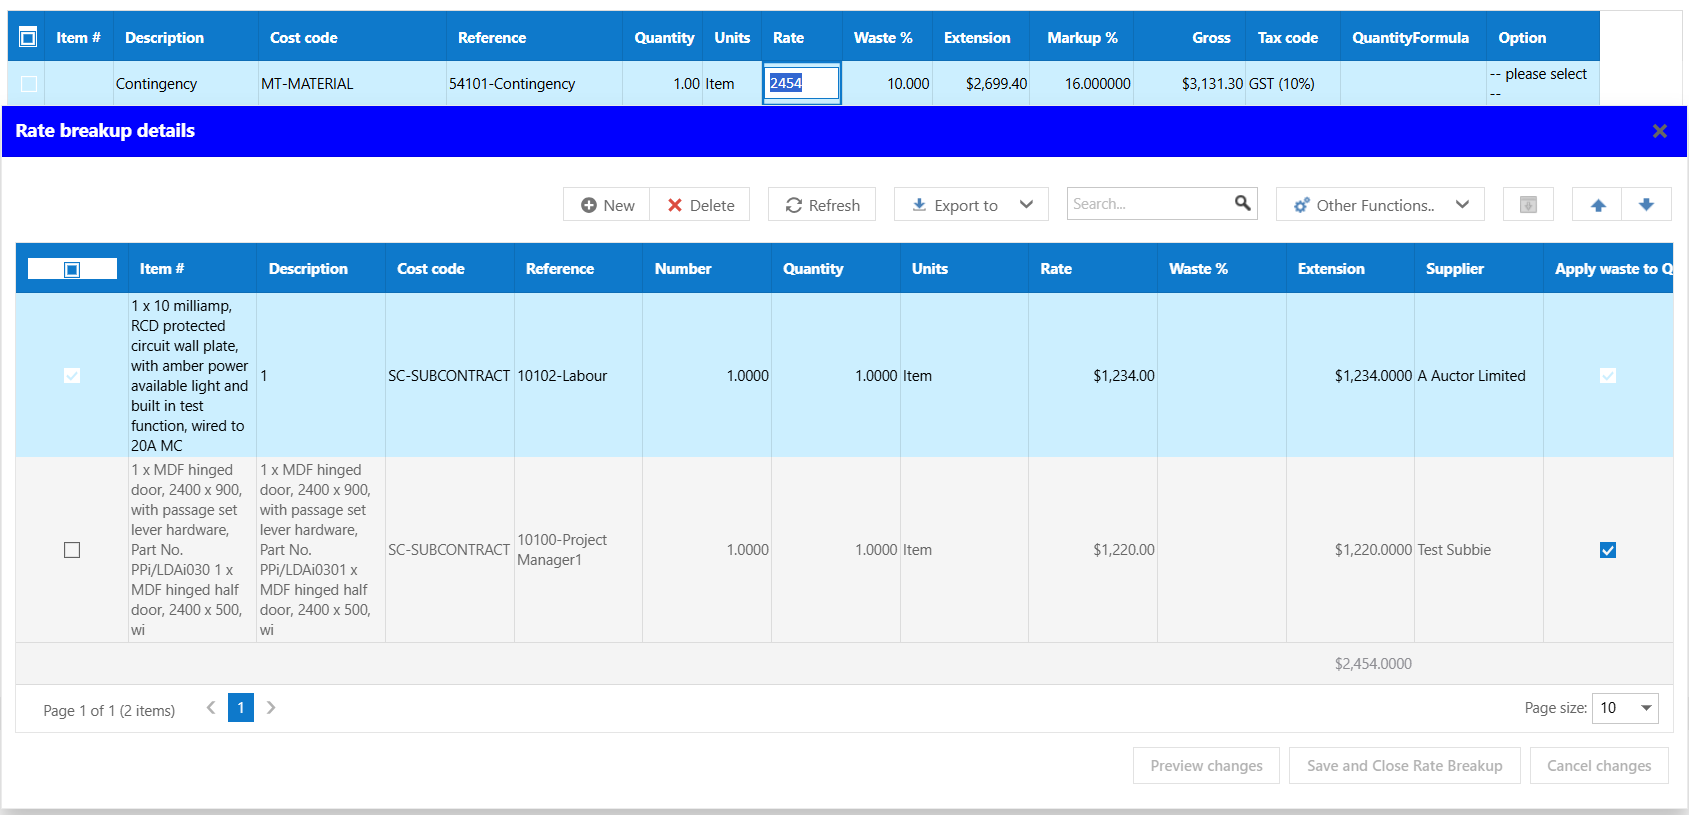
Rate Breakup Details
Double click on the rate of a line item to open the "Rate breakup details"
In this screen a user can enter any component details that make up the main line, this allows users to enter a line item that is calculated by the rate breakup behind the scenes.
- Save and Close Rate Breakup
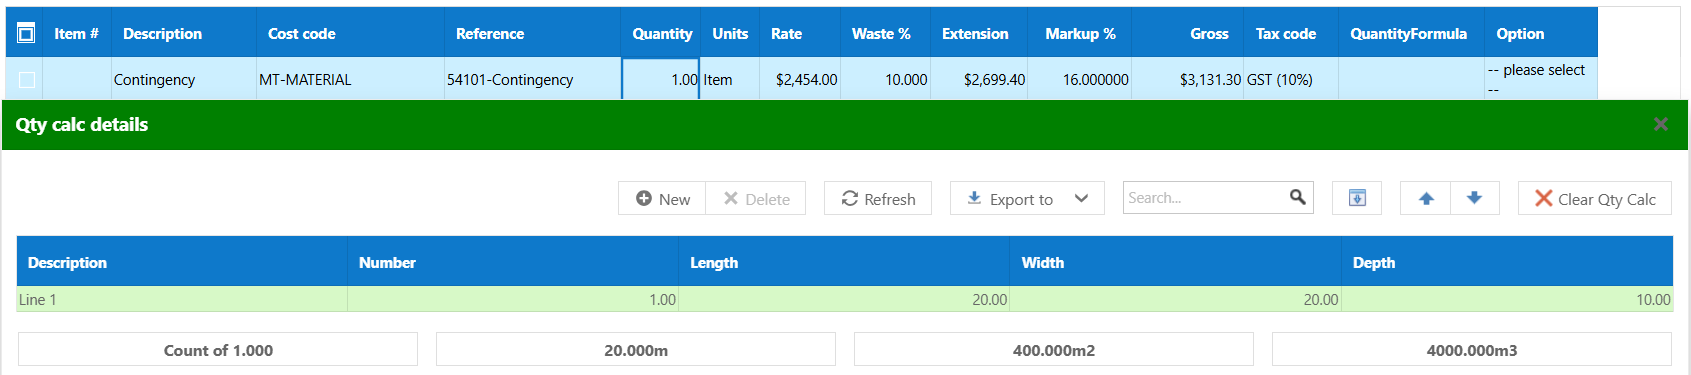
Quantity Calculations
Create calculated quantities using dimensions, similar to the rate breakup, the user has control over the QTY calculation details, this can be used to formulate your estimate quantities where necessary. Double click the QTY field to open the QTY calculation details. A user can use the buttons along the bottom to automatically enter the count, per meter, meter squared or meter cubed calculations.
- Fields include Length, Width, Depth
- Supports Number, Area, and Volume calculations
Saving Changes
- Preview changes
- Save changes
- Cancel changes

Was this article helpful?
That’s Great!
Thank you for your feedback
Sorry! We couldn't be helpful
Thank you for your feedback
Feedback sent
We appreciate your effort and will try to fix the article