Template QoL Changes
We've made some quality of life changes around template downloading and field checking that will help with identifying/modifying template fields. These new functions are behind security settings in System > User & License > Core module functions.
Template Logo's
This change will be great for those times where a logo of header information may be changed/updated
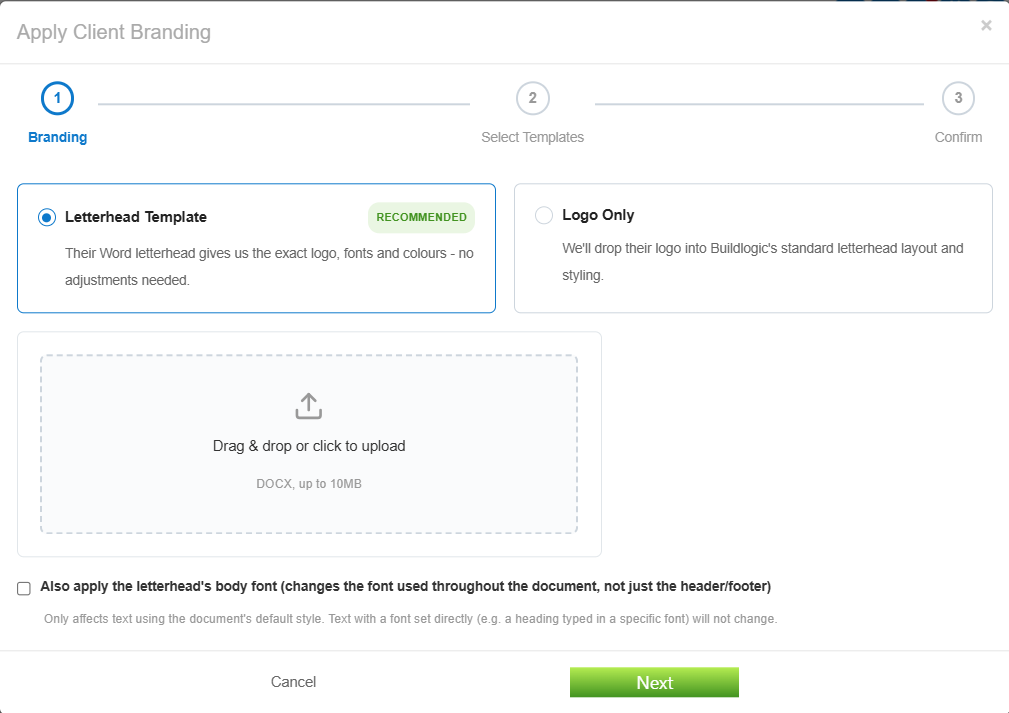
The feature will allow users to upload a word document with a new header/footer and apply this to your selected existing templates, if your logo or header information changes, a user can navigate to Reports > Reports & Templates list
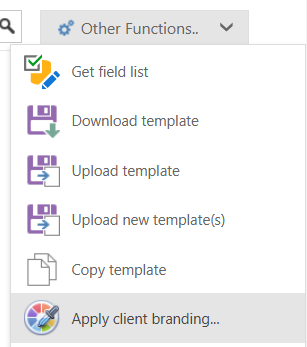
From the other functions they will notice an option for 'apply client branding'
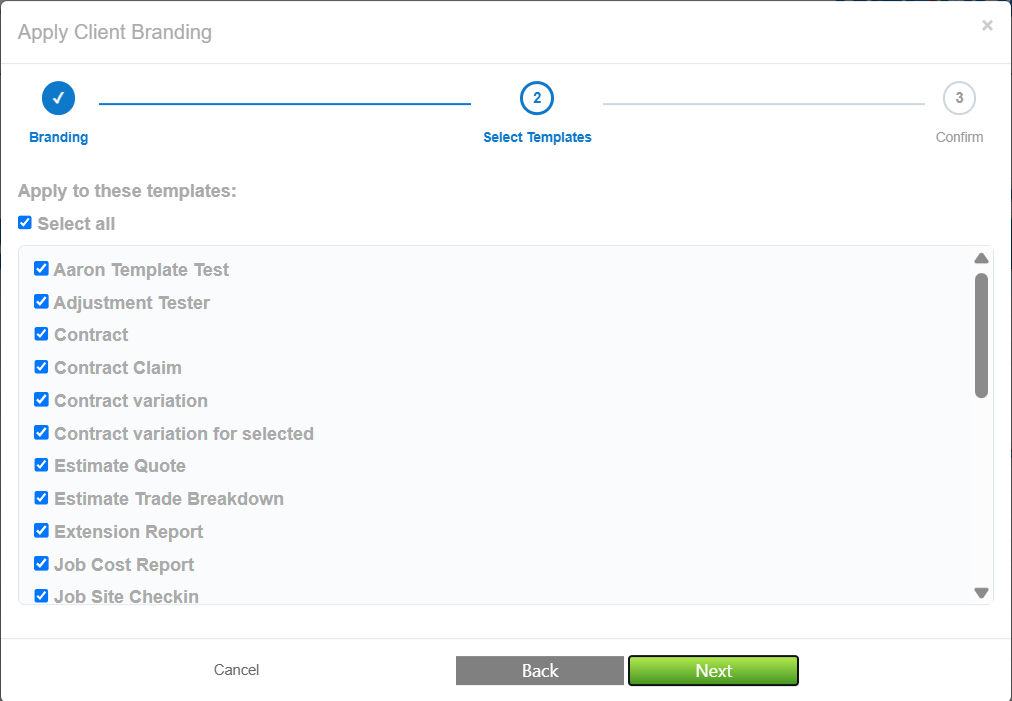
If a user selects this option they will be presented with a screen that allows them to upload a letterhead template, the next dialogue will prompt the user to select template that this new letterhead should be applied to. Allowing the user to update in bulk the letterhead for existing templates.
Template Download
We have added the ability to more quickly download a template, there is now a download button in the same place that the template is produced from, so users can now download the associated mail merge document directly from where it is produced.

Template Information
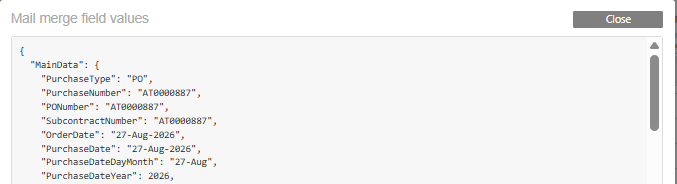
In the same section we've also added an information icon that will print the data of the template along with the associated mail merge field, this may not make sense for someone who does not understand how mail merge fields work but is a great tool for diagnosis when a field might be printing a number that doesn't make sense to the user. 
Contact QoL Changes
We've added the ability for users to quickly update contacts in bulk, the fields they can update are listed in the below image
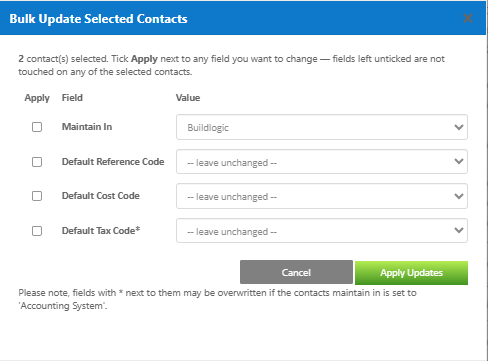
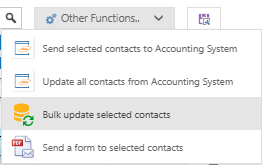
To access this dialogue the user should navigate to the contacts list, other functions menu, select the contacts you want to update and then choose the 'bulk update contacts' option in the contact list.
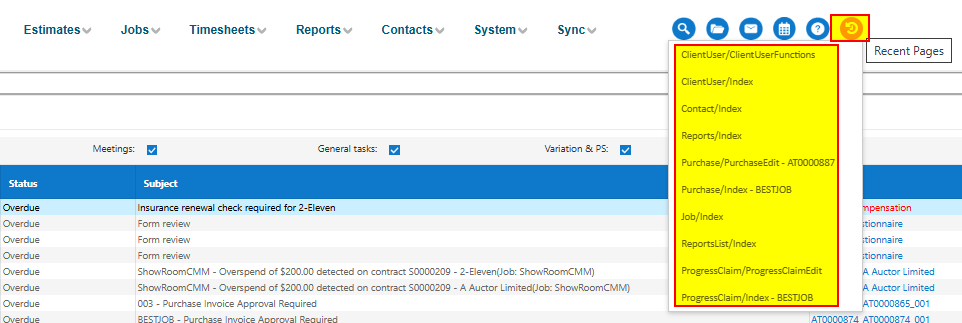
Recent Pages List
We've added an icon at the top of the page that will print the last 10 pages a user has visited; this will be helpful if you need to jump back to a page you've already been to, will save having to navigate back through the system again.
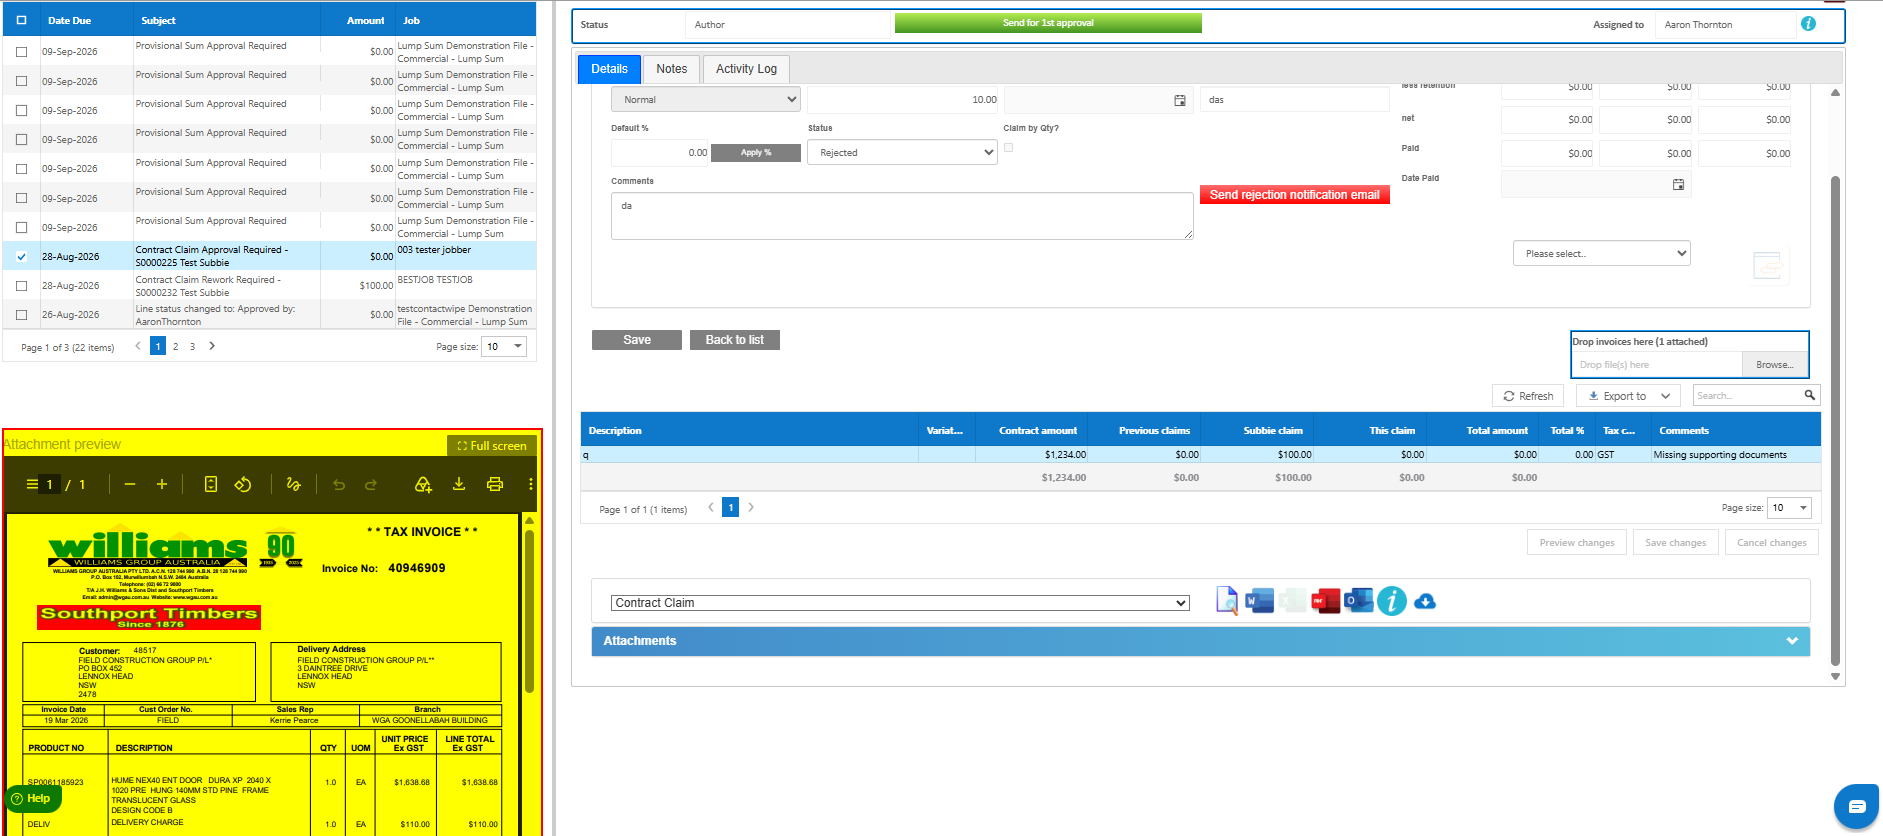
Approvals Window Preview
We've added a preview pane to show attachments on the approvals window, hopefully to help users while approving items in their list, they will no longer have to download and open the document to check attachments, it should now preview the attachment under the approvals list itself.
Site Information - Job Tab
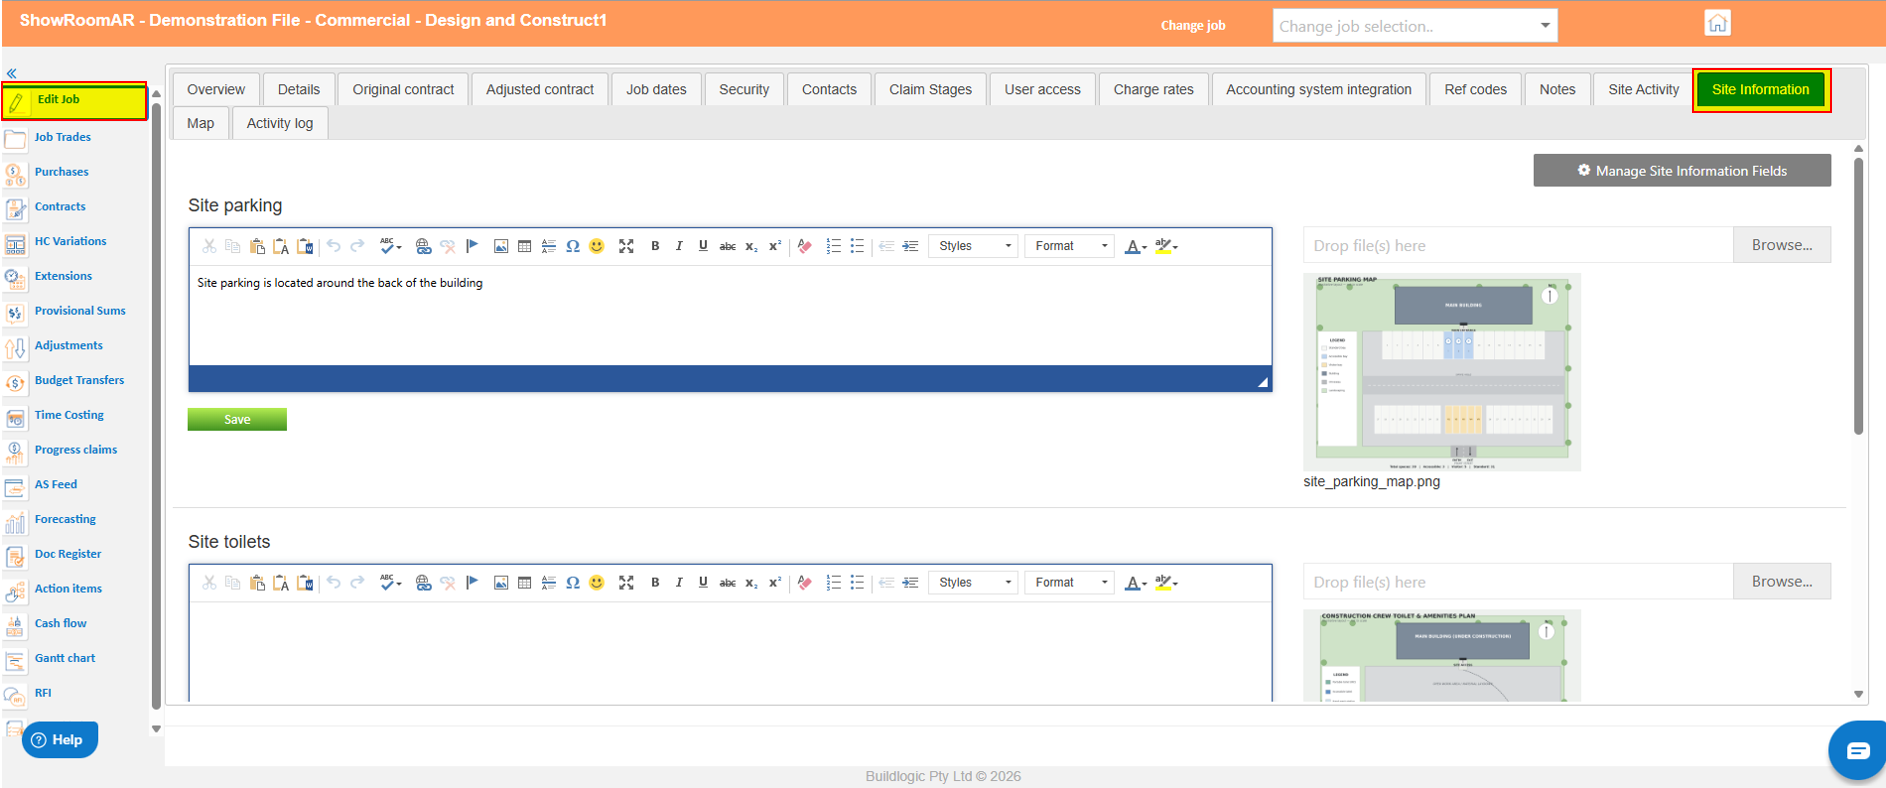
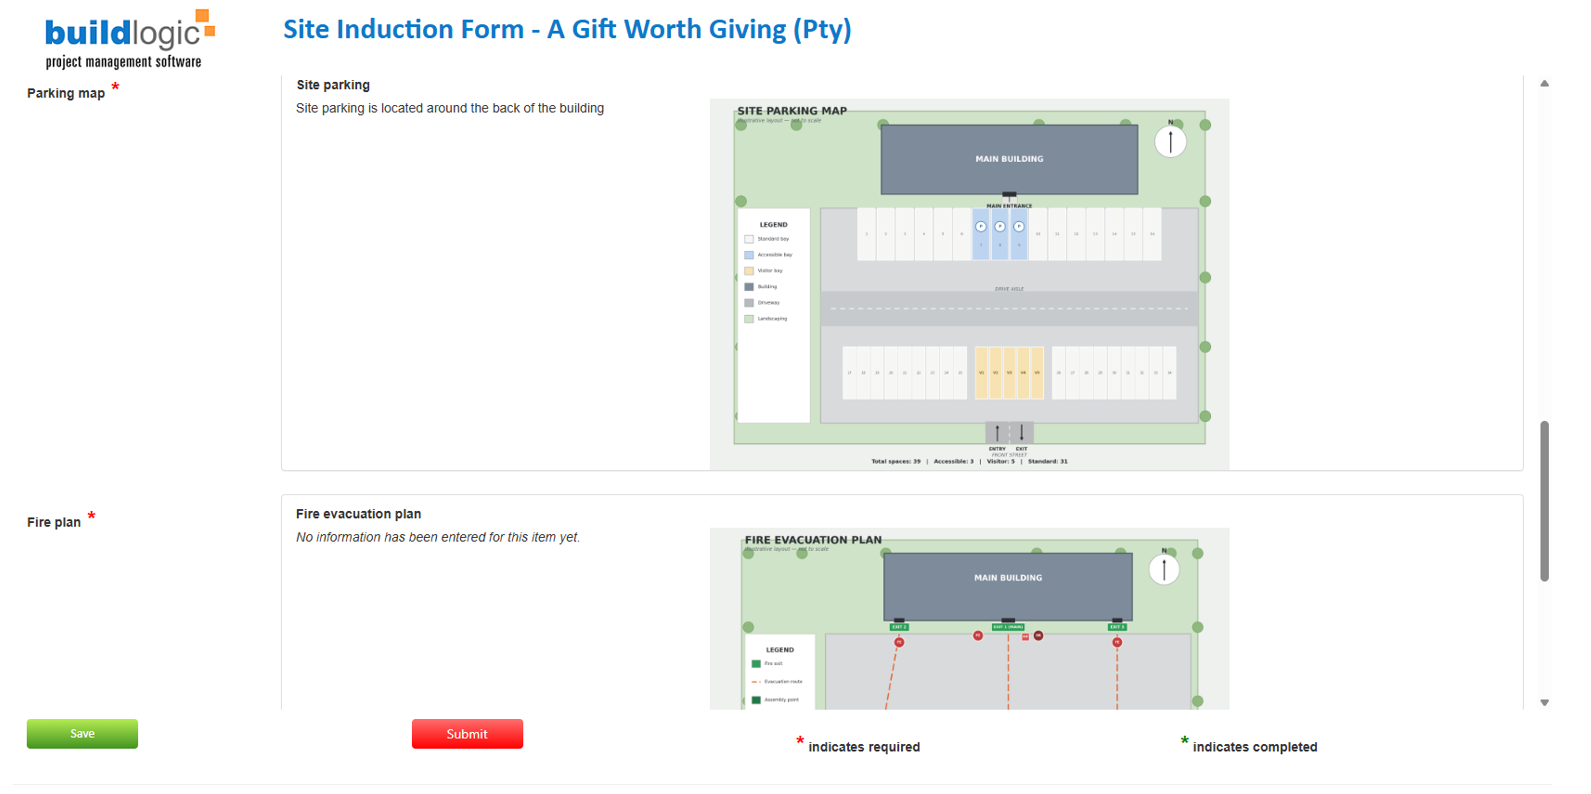
We've added a site information tab to the jobs section, a user can now add site information such as a map or fire exit locations, parking, etc. This can be wired into existing templates or forms that get sent from Buildlogic also, which should help with forms that are sent to site staff.
Again this needs to be enabled in core functions: (Use the Job Site Information tab (save rich text, upload images))
Subbie claim rejection workflow
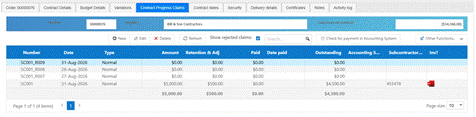
Users can now reject subcontractor claims - and notify the contractor via email of the rejection with reasons. Under a contract claim, there is a new status Rejected. Claims can be rejected a number of times and rejected claims are stored. To view rejected claims, click the Show rejected claims check box at the top of the claims list.
1. Where to find it
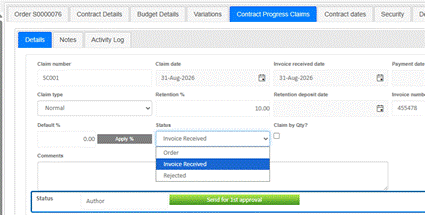
Open the relevant Purchase Order / Contract, go to the Payments tab, and open (or create) a Progress Claim. The Claim Status field — previously Order / Invoice Received — now also offers Rejected.
Claim Status dropdown showing Order / Invoice Received / Rejected |
The Contract Progress Claims register (the Payments grid) has a new “Show rejected claims” checkbox above the grid. Rejected/renamed claims are hidden by default to keep the day-to-day list clean; tick the box to see the full history, including every rejected and renamed claim.
Payments grid with the ‘Show rejected claims’ checkbox highlighted |
2. Rejecting a claim
- Open the claim you want to reject.
- On every detail line that has a Subbie claim amount, enter the reason for rejecting that line in its Comments cell.
- Change Claim Status to Rejected.
- Click Save.
Comments are mandatory Save is blocked if any claimed line's Comments cell is blank — you'll see a validation message and the claim will not be saved as Rejected. Fill in every claimed line's Comments cell and click Save again. |
On a successful save:
- “This claim” is reset to $0 on every line — the rejection is total, not partial.
- The claimed-to-date total is not wiped — it drops back to whatever was claimed on previous claims, so earlier approved amounts are untouched.
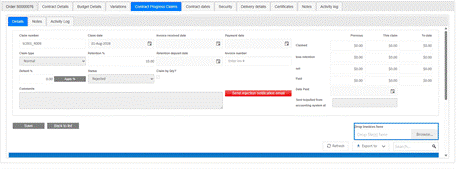
- The claim becomes fully read-only — no fields can be edited while Status = Rejected, other than the Status field itself (changing it away from Rejected unlocks the claim again, provided the claim isn't also linked to the accounting system).
- A “Send rejection notification email” button appears.
Saved rejected claim: locked fields, This claim = $0, Send rejection notification email button visible |
3. Sending the rejection notification
Click “Send rejection notification email” to open a preview of exactly what will be sent — recipient, subject, the per-line reasons, and the resubmit link — before anything goes out.
Rejection email preview popup |
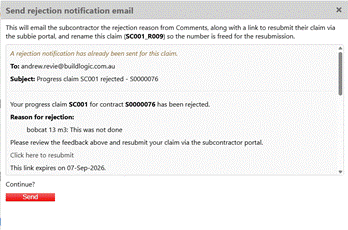
Click Send to confirm. This does three things in one step:
- Emails the subcontractor the rejection reason(s) and a “Click here to resubmit” link into the subcontractor portal (the link expires after 5 days). If a “Rejection” report template is configured, a mail-merged PDF is attached as well — if not, the email still sends without one.
- Renames the claim in place, e.g. SC003 becomes SC003_R001, freeing SC003 so the subcontractor's resubmission can reuse it. The original claim record is never deleted — only renamed — so the full history is preserved.
- Logs the rejection to the claim's and the contract's activity log.
Resending a notification If you click Send again on a claim that's already been notified (its number already carries an _Rxxx suffix), you'll now be asked to confirm before it resends — useful if the first email bounced, but it stops an accidental double-send from going unnoticed. |
4. What the subcontractor sees
The subcontractor receives an email containing the reason for rejection (per claimed line) and a “Click here to resubmit” link. Following the link opens the subcontractor portal, where they can submit a new claim on the same contract — it will automatically pick up the original claim number that was just freed (e.g. SC003).
If that resubmitted claim is later rejected as well, it's renamed with the next suffix (e.g. SC003_R002, not SC003_R001 again), so every rejection round is kept distinct in the history.
5. Viewing rejected claims
Nothing is ever deleted. To see the full claim history including every rejected/renamed claim, tick “Show rejected claims” on the Payments grid (see Section 2). Turn it off again to return to the normal day-to-day view of active claims only.
Was this article helpful?
That’s Great!
Thank you for your feedback
Sorry! We couldn't be helpful
Thank you for your feedback
Feedback sent
We appreciate your effort and will try to fix the article